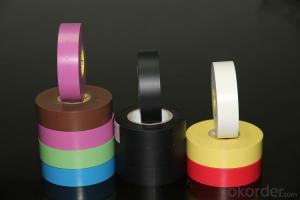
When it comes to home improvement projects, masking tape is a versatile tool that can make all the difference in achieving a flawless finish. Whether you’re painting, staining, or simply adding a touch of creativity to your walls, the right masking tape can help you protect surfaces and create clean lines. In this article, we’ll explore the best practices for using masking tape, offering tips and tricks to ensure your project turns out just the way you envisioned it.
Choosing the Right Masking Tape
The first step in using masking tape effectively is choosing the right type for your project. There are several varieties available, each with its own set of benefits and drawbacks.
General Purpose Masking Tape: This is your go-to tape for most painting projects. It’s easy to apply, removes cleanly, and won’t leave residue on most surfaces.
Painter’s Masking Tape: Designed specifically for painting, this tape offers a sharp edge for clean lines and can be easily removed without damaging the paint underneath.
Multi-Purpose Masking Tape: Great for a variety of applications, including heavy-duty jobs. It’s more durable but may leave residue on some surfaces.
Consider the Surface
Before you start taping, consider the surface you’re working with. Different surfaces may require different types of tape. For instance, if you’re working with a delicate surface like wallpaper or fabric, you’ll want to opt for a low-tack tape to prevent damage.
Prep Your Surface
Proper surface preparation is key to ensuring your masking tape adheres well and provides a clean edge. Clean the area thoroughly to remove any dust, dirt, or grease that could interfere with the tape’s adhesion.
Applying the Tape
When applying the tape, start at one end and apply it slowly and evenly, pressing down firmly as you go to ensure it sticks well to the surface. Don’t forget to overlap the edges slightly to prevent paint or stain from seeping underneath.
Using Edges and Corners
Edges and corners can be tricky, but with a little practice, you can master them. Use a putty knife or your fingernail to press the tape firmly into the corner, ensuring a tight seal.
Removing the Tape
The best time to remove masking tape is immediately after your paint or stain has dried. Removing it too early can result in smudges or an uneven finish. Be gentle to avoid peeling off the paint or stain with the tape.
Creative Uses for Masking Tape
Masking tape isn’t just for home improvement projects. It can also be used for creative endeavors, such as making patterns on walls or creating a custom design on furniture. The possibilities are endless!
Tips for a Flawless Finish
Here are some additional tips to help you achieve a flawless finish with your masking tape:
Press firmly along the entire length of the tape to ensure good adhesion.
Use multiple pieces of tape to create wider lines or borders if needed.
Apply tape in a well-ventilated area to avoid inhaling fumes from paint or stain.
Store your tape in a cool, dry place to maintain its stickiness.
If you’re using tape for a stencil, make sure it’s applied smoothly without wrinkles or bubbles.
Practice your technique on a scrap piece of material before applying it to your final surface.
Common Mistakes to Avoid
While using masking tape, there are a few common mistakes to avoid:
Don’t use the same piece of tape multiple times, as it will lose its adhesive quality.
Avoid stretching the tape, as this can cause it to tear or lose its shape.
Don’t apply the tape too tightly, as this can cause it to leave residue or damage the surface.
Remember to remove the tape before the paint or stain is completely dry to prevent damage.
In Conclusion
Masking tape is a simple yet powerful tool that can greatly enhance the outcome of your home improvement or creative project. By following these best practices and tips, you can ensure a flawless finish that you’ll be proud to show off. So, the next time you’re about to embark on a project, remember to reach for the masking tape and let it guide you to a beautiful result.

