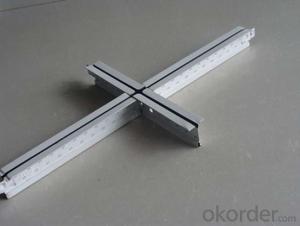
Embarking on a ceiling grid installation project can feel like a daunting task, especially for those who are new to the process. However, with the right tools and a bit of know-how, it can become a manageable and even enjoyable experience. In this article, well guide you through the essential ceiling grid tools youll need to complete any installation with ease. Whether youre a seasoned professional or a DIY enthusiast, our toolkit will ensure you have everything you need to get the job done right.
The Basics: What Are Ceiling Grids?
Before we dive into the tools, lets clarify what ceiling grids are. Ceiling grids, also known as drop ceilings or suspended ceilings, are a popular choice for many commercial and residential spaces. They offer a versatile and cost-effective solution for hiding utilities, improving acoustics, and providing a clean, modern look. Made from materials like metal or mineral fiber, these grids are typically composed of a series of interlocking panels and tiles that can be easily accessed for maintenance or updates.
The Toolkit: Essential Tools for Every Installer
Now that weve established what were working with, lets talk about the tools youll need to tackle a ceiling grid installation. Heres a comprehensive list of must-haves for your toolkit:
1. Measuring Tape
Starting with the basics, a measuring tape is an indispensable tool for any installation project. It helps you determine the dimensions of the area youre working with and ensures that your grid layout is accurate.
2. Utility Knife
A sharp utility knife is essential for cutting the grid materials to size. Whether youre trimming panels or making precise cuts for custom installations, this tool will be your go-to for clean, accurate cuts.
3. Grid Layout Tool
This specialized tool helps you map out your grid layout before you start installing. Its a time-saver and ensures that your grid is evenly spaced and symmetrical.
4. Hammer and Nails
For securing the grid to the ceiling, a hammer and nails are your traditional go-to tools. They provide a sturdy and reliable method for fastening the grid in place.
5. Screwdriver Set
Not all grid systems use nails, though. Some may require screws, which is where a versatile screwdriver set comes in handy. Make sure you have a variety of head types and sizes to accommodate different fasteners.
6. Level
A level is crucial for ensuring that your grid is installed straight and even. Its a quick way to check your work and make adjustments as needed.
7. Ladder or Step Stool
Access is key when installing a ceiling grid. A sturdy ladder or step stool will provide you with the elevation you need to work comfortably and safely.
8. Safety Gear
Safety should never be overlooked. Make sure you have the proper safety gear, including gloves, safety glasses, and a hard hat to protect yourself during the installation process.
9. Grid Cutting Tool
While a utility knife can handle some cuts, a grid cutting tool is specifically designed for cutting grid materials. It offers greater precision and ease of use for more complex cuts.
10. Panel Lifter or Suction Cup
Once your grid is installed, youll need a panel lifter or suction cup to lift and remove the panels for access to the space above.
The Process: A Step-by-Step Guide
With your toolkit assembled, lets walk through the process of installing a ceiling grid. Well keep it straightforward and easy to follow, so you can focus on the task at hand.
Step 1: Plan Your Layout
Before you start cutting and installing, plan out your grid layout. Use the measuring tape and grid layout tool to map out the dimensions and ensure everything is symmetrical.
Step 2: Secure the Grid to the Ceiling
Using your hammer and nails or screwdriver set, secure the grids perimeter to the ceiling. Make sure to use a level to check for straightness as you work.
Step 3: Install the Main Grid Structure
With the perimeter secured, you can now install the main grid structure. This involves connecting the grid runners and cross tees to create the framework for your panels.
Step 4: Cut and Fit the Panels
Using your utility knife or grid cutting tool, cut the panels to fit within the grid. Be sure to use a level to ensure theyre properly aligned as you install them.
Step 5: Accessorize as Needed
Depending on your project, you may need to add additional components like lighting fixtures or air vents. Make sure you have the necessary tools and hardware to secure these elements.
Step 6: Final Inspection and Adjustments
Once everything is in place, do a final inspection. Use your level to check for any areas that may need adjustment and make sure all panels are securely fastened.
The Extras: Personalizing Your Toolkit
While the above list covers the essentials, dont be afraid to personalize your toolkit with additional items that make your installation process smoother. This could include things like a magnetic stud finder, a cordless drill for faster work, or even a small vacuum for quick clean-up.
The Wrap-Up: Your Path to Success
Installing a ceiling grid might seem intimidating at first, but with the right tools and a step-by-step approach, you can transform any space with ease. Remember, the key to a successful installation is preparation, precision, and patience. So, gather your toolkit, roll up your sleeves, and get ready to elevate your ceiling to new heights!

