When it comes to home improvement or HVAC system installation, connecting flexible ducts is an essential task. These ducts are crucial for the proper functioning of heating, ventilation, and air conditioning systems. They help in distributing conditioned air throughout the building. However, connecting them can be a daunting task for many, especially for those who are new to this process. But don’t worry, we’ve got you covered. In this article, we will discuss various techniques and best practices for connecting flexible ducts. We’ll keep it light and friendly, just like a conversation with a knowledgeable friend.
The Importance of Proper Connection
Before we dive into the techniques, it’s important to understand why connecting flexible ducts correctly is so important. A proper connection ensures that the air distribution is efficient and even. It also prevents air leaks, which can lead to energy wastage and higher utility bills. Moreover, a secure connection helps in reducing noise and vibrations that can be annoying during operation.
Choosing the Right Duct Material
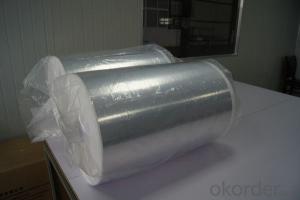
The first step in connecting flexible ducts is choosing the right material. There are various types of flexible ducts available in the market, such as flexible fiberglass, flexible aluminum, and semi-rigid ducts. Each type has its own advantages and disadvantages. For instance, flexible fiberglass is lightweight and easy to install, but it can be damaged by rodents. On the other hand, flexible aluminum is more durable but can be more challenging to work with. So, it’s essential to consider your specific needs and preferences before making a choice.
Preparing the Ducts for Connection
Once you’ve chosen the right duct material, the next step is preparing the ducts for connection. This involves cleaning the ducts to remove any dust or debris that may be present. It’s also a good idea to inspect the ducts for any damage or wear and tear. If you find any issues, it’s better to replace the ducts before proceeding with the connection process.
Techniques for Connecting Ducts
Now that the ducts are ready, let’s talk about the actual techniques for connecting them. There are several methods available, and the choice depends on the type of duct and the specific requirements of your project. Here are some of the most common techniques:
Clamping
Clamping is a simple and effective method for connecting flexible ducts. It involves using clamps or clips to secure the ducts together. This method is quick and easy, but it may not provide the strongest connection, especially for larger ducts.
Taping
Taping is another popular method for connecting ducts. It involves using duct tape or mastic tape to create a seal between the ducts. This method is more secure than clamping, but it’s essential to use the right type of tape and apply it correctly to ensure a proper seal.
Flanging
Flanging is a more advanced technique that involves creating a flange or a collar on the ducts before connecting them. This method provides a strong and secure connection, but it requires more skill and time to execute.
Best Practices for Connecting Ducts
In addition to the techniques mentioned above, there are several best practices that you should follow when connecting flexible ducts. These practices will help ensure a successful and long-lasting connection.
Measure Twice, Cut Once
It’s a classic saying, but it’s especially true when it comes to connecting ducts. Make sure to measure the length and diameter of the ducts accurately before cutting them. This will help prevent any mistakes and ensure a proper fit.
Use the Right Tools
Using the right tools is crucial for a successful duct connection. This includes a sharp utility knife for cutting, a measuring tape for accurate measurements, and the appropriate clamps, tapes, or flanges for the connection method you choose.
Follow the Manufacturer’s Instructions
Each type of duct and connection method may have specific instructions provided by the manufacturer. It’s essential to follow these instructions carefully to ensure the best results.
Check for Leaks
After connecting the ducts, it’s important to check for any leaks. You can do this by using a smoke pencil or a pressurized air test. This will help you identify and fix any issues before they become bigger problems.
Common Challenges and How to Overcome Them
Connecting flexible ducts can sometimes be challenging, but with the right knowledge and tools, you can overcome these challenges. Here are some common issues and how to deal with them:
Ducts Not Lining Up
If the ducts are not lining up correctly, it may be due to incorrect measurements or a bend in the duct. In this case, you may need to re-measure and cut the ducts or use a duct straightener to fix the bend.
Difficulty in Securing Ducts
If you’re having trouble securing the ducts, it could be because of the wrong connection method or poor quality clamps or tapes. Make sure to choose the right method and use high-quality materials to ensure a secure connection.
Leaks After Connection
Leaks can occur even after a successful connection. If you find any leaks, it’s essential to identify the source and fix it immediately. This may involve reapplying tape, using a different connection method, or even replacing the ducts if they are damaged.
Conclusion
Connecting flexible ducts may seem like a daunting task, but with the right techniques, best practices, and a bit of patience, you can get it done. Remember to choose the right duct material, prepare the ducts properly, and follow the best practices for a successful connection. And don’t forget to check for leaks and address any challenges that may arise. With these tips, you’ll be able to connect flexible ducts like a pro in no time.
So, there you have it, folks! Connecting flexible ducts is not as scary as it seems. With a little guidance and the right approach, you can ensure that your HVAC system runs smoothly and efficiently. And who knows, you might even save some money on your energy bills in the process. Happy connecting!

