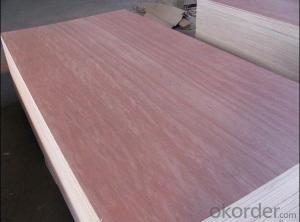
MDF, or Medium Density Fiberboard, is a versatile material that has become increasingly popular among DIY enthusiasts and professional woodworkers alike. It’s affordable, easy to work with, and offers a consistent surface for painting, staining, or veneering. In this article, we’ll explore some tips and techniques for crafting with MDF, making it a fun and rewarding experience.
Why Choose MDF?
MDF is a man-made wood product made from wood fibers and resin, which are combined under heat and pressure. It’s denser and stronger than particleboard, making it an excellent choice for a variety of projects. Plus, it’s more stable and less prone to warping, which is a significant advantage when working on detailed designs.
Getting Started with MDF
Before you dive into your MDF projects, it’s essential to gather the right tools and materials. Here’s a list of basic items you’ll need:
– A saw (circular, jigsaw, or table saw) for cutting MDF
– Sandpaper for smoothing edges and surfaces
– Wood glue or a suitable adhesive for MDF
– Screws and nails for assembly
– Paint, stain, or veneer for finishing
Cutting MDF
Cutting MDF can be a breeze if you follow these steps:
1. Measure and mark your cuts accurately.
2. Use a fine-tooth blade on your saw for cleaner cuts.
3. Cut slowly and steadily to avoid chipping the edges.
4. After cutting, sand the edges to remove any rough spots.
Shaping and Sanding MDF
Once you’ve cut your MDF pieces, it’s time to shape and sand them to achieve the desired look:
1. Use a router or chisel to create more intricate shapes.
2. Sand the surfaces with progressively finer grits of sandpaper.
3. Always sand in the direction of the wood grain to avoid scratches.
Attaching MDF Pieces
Securing MDF can be done with various methods, but here are some general tips:
1. Use wood glue for a strong bond, especially on smaller pieces.
2. For larger assemblies, consider using screws and nails.
3. Pre-drill holes to prevent the MDF from splitting.
Finishing MDF
The finishing process is where your project really comes to life. Here are some options:
1. Paint MDF for a vibrant, colorful look. Use a primer before painting for better adhesion.
2. Stain MDF to bring out the wood’s natural beauty. Choose a stain that’s compatible with MDF.
3. Apply a veneer for a more luxurious, real wood appearance.
4. Seal your project with a clear coat to protect it from damage.
MDF and Water
One thing to keep in mind when working with MDF is its sensitivity to water. To avoid damage:
1. Avoid prolonged exposure to moisture.
2. If your project will be outdoors or in a damp area, consider using a water-resistant sealer.
3. Always allow MDF to dry completely before applying any finish.
Creative MDF Projects
Now that you have the basics down, let’s get creative with some project ideas:
– Build a stylish coffee table with storage compartments.
– Create a unique headboard for your bed.
– Design a set of floating shelves for your living room.
– Craft a personalized picture frame.
Troubleshooting Common MDF Issues
Every material has its quirks, and MDF is no exception. Here are some common issues and how to address them:
– Chipping: Use a sharp blade and cut slowly.
– Warping: Ensure your MDF is stored flat and use water-resistant sealers.
– Finish not adhering: Always prime MDF before painting or staining.
Safety First
Safety should always be a priority when working with any material. Remember to:
– Wear protective gear, such as goggles and gloves.
– Work in a well-ventilated area to avoid inhaling dust.
– Keep your workspace clean and organized to prevent accidents.
Conclusion
Crafting with MDF can be an incredibly rewarding experience. It’s a material that offers endless possibilities for creativity and functionality. By following these tips and techniques, you’ll be well on your way to creating beautiful, durable pieces that you can be proud of. So, gather your tools, and let’s get crafting!

