So, you’ve decided to take the plunge and go green by installing solar panels on your own? That’s awesome! But, before you get started, let me tell you, it’s not as daunting as it may seem. In fact, it can be quite a fun and rewarding project. In this guide, I’ll walk you through the step-by-step process of installing DIY solar panels, making it as easy as pie. Let’s dive in, shall we?
Why DIY Solar Panels?
First things first, why would you want to install solar panels yourself? Well, there are several reasons. It’s cost-effective, gives you a sense of accomplishment, and most importantly, it’s a step towards a more sustainable future. Plus, who doesn’t love saving some hard-earned cash?
Gather Your Tools and Materials
Before you begin, you’ll need to gather all the necessary tools and materials. This includes solar panels, a solar charge controller, batteries, mounting hardware, wiring, and an inverter. Make sure you have everything on hand to avoid any hiccups during the installation process.
Assess Your Energy Needs
Next, you’ll need to assess your energy needs. This will help you determine the size and number of solar panels you’ll require. Take a look at your electricity bills to get an idea of your average daily usage. Remember, it’s always better to have a little extra capacity than not enough.
Choose the Right Location
The location of your solar panels is crucial for maximizing their efficiency. Look for a spot that gets plenty of sunlight throughout the day. Your roof is usually the best option, but if that’s not possible, a south-facing wall or even your backyard might work.
Design Your System
Now it’s time to design your solar system. This involves calculating the number of panels, the type of batteries, and the size of the inverter you’ll need. There are plenty of online tools and calculators that can help you with this. Don’t worry, it’s not as complicated as it sounds.
Mount the Solar Panels
With your design in place, it’s time to mount the solar panels. This is where your mounting hardware comes into play. Make sure they’re securely fastened to prevent any damage from wind or other elements.
Install the Charge Controller
The solar charge controller is the brain of your system. It regulates the flow of electricity from the panels to the batteries. Install it in a sheltered location, and make sure it’s connected properly to avoid any electrical issues.
Connect the Batteries
Batteries store the energy generated by your solar panels. Connect them to the charge controller and ensure they’re properly ventilated to prevent overheating.
Wire the System
Now comes the wiring part. Connect the solar panels to the charge controller, and then to the batteries. Make sure all connections are secure and properly insulated to prevent any short circuits.
Install the Inverter
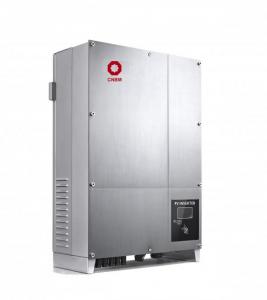
The inverter is what converts the DC power from your solar panels into AC power that can be used in your home. Install it near your main electrical panel and connect it to your batteries.
Test Your System
Finally, it’s time to test your system. Make sure everything is working as it should. Check the voltage and current readings on your charge controller and inverter to ensure they’re within the correct range.
Maintenance and Troubleshooting
Once your system is up and running, don’t forget about maintenance. Regularly check your panels for dirt and debris, and clean them as needed. If you encounter any issues, don’t panic. Most problems can be solved with a bit of troubleshooting and a careful inspection of your system.
The Benefits of Going Solar
There are numerous benefits to going solar, from reducing your carbon footprint to saving on energy bills. Plus, the satisfaction of generating your own clean energy is priceless.
Wrapping Up
So, there you have it. Installing DIY solar panels is a project that’s within reach for many homeowners. With a bit of planning, the right tools, and a willingness to learn, you can harness the power of the sun and power your home sustainably. Remember, every step you take towards renewable energy is a step towards a brighter future. Happy solar powering!

