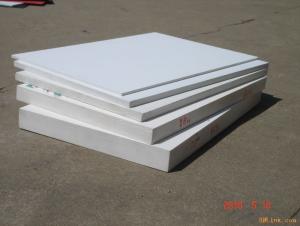
So, youve decided to give your home or office a fresh new look by installing a drywall drop ceiling grid. Thats a fantastic choice! Not only does it provide a clean, modern aesthetic, but it also offers a variety of benefits such as improved acoustics, better lighting options, and easy access to utilities. But, you might be wondering, how do you install this bad boy without breaking the bank or your back? Fear not, because Im here to guide you through the process step by step, with a few personal anecdotes and tips thrown in for good measure.
The Beauty of Drywall Drop Ceilings
Before we dive into the installation process, lets talk about why drywall drop ceilings are so awesome. Theyre not just about hiding those unsightly pipes and wires; theyre about creating a space that looks professional and put-together. Plus, theyre super versatile. Whether youre going for a sleek, minimalist look or something a bit more ornate, a drywall drop ceiling can help you achieve your vision.
Planning Your Project
The first step in any home improvement project is planning. This is especially true for a drywall drop ceiling. Youll need to consider the layout of your room, the type of grid you want to use, and the materials youll need. Dont skip this step, or you might end up with a ceiling that doesnt quite fit your space or meets your needs.
Choosing the Right Grid System
There are several types of grid systems available, and choosing the right one is crucial. Youve got your main tees, cross tees, and angle tees, each serving a different purpose. Main tees run the length of the room, cross tees run perpendicular to the main tees, and angle tees are used for corners. Make sure youve got the right mix for your space.
Gathering Your Materials
Once youve got your grid system sorted, its time to gather your materials. Youll need drywall, screws, a drill, a tape measure, a utility knife, and some basic tools. Dont forget the safety gear – safety glasses, gloves, and a dust mask are a must.
Setting Up the Grid
Now comes the fun part – setting up the grid. Start by marking the ceiling joists and snapping chalk lines to guide your installation. Then, attach the main tees to the ceiling joists using screws. Make sure theyre level and secure. Next, slide the cross tees into the main tees. Its like building a giant, intricate puzzle, and its oddly satisfying.
Cutting Drywall to Size
With the grid in place, its time to cut the drywall to size. Measure the distance between the grid lines and cut your drywall panels accordingly. Use a utility knife for clean, straight cuts. Remember to make safety your priority – those drywall edges can be sharp.
Installing the Drywall
Once your drywall is cut, its time to install it. Lift the panels into place and secure them with screws. Be sure to use a screwdriver that wont damage the drywalls surface. You want those screws to be snug, but not so tight that they crack the drywall.
Finishing Touches
After all the panels are up, its time for the finishing touches. Fill in any gaps between the panels with joint compound and sand it smooth. Then, prime and paint the ceiling to match the rest of your space. And voila! Youve got a professional-looking drywall drop ceiling.
Troubleshooting Common Issues
Of course, no project goes perfectly every time. You might encounter some issues along the way, like uneven grid lines or difficulty cutting the drywall. Dont fret – just take a deep breath and tackle the problem head-on. A little patience and creativity can go a long way.
The Personal Touch
One of the best parts about installing a drywall drop ceiling is the opportunity to add your personal touch. Whether its choosing a unique paint color, adding decorative tiles, or incorporating lighting fixtures, the possibilities are endless. Make it yours and enjoy the pride of a job well done.
In Conclusion
Installing a drywall drop ceiling grid might seem daunting at first, but with the right planning, tools, and a bit of elbow grease, you can achieve a professional look that will impress your friends, family, and colleagues. Remember, the key is in the details – take your time, pay attention to the small stuff, and youll end up with a ceiling that looks like it was installed by the pros. So, go ahead, roll up your sleeves, and get ready to elevate your space to new heights!

