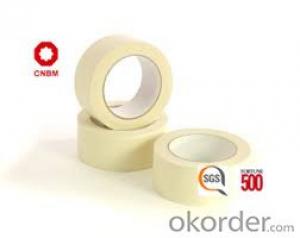
Crafting the Perfect Finish: The Art of Masking Tape Application
Masking tape, a simple yet powerful tool in the world of home improvement, DIY projects, and professional painting, can make or break your project’s final appearance. Whether you’re a seasoned pro or a beginner, the difference between a professional and amateur finish often lies in the choice and application of masking tape. In this article, we’ll explore the nuances of good masking tape, the mistakes to avoid, and tips for achieving that flawless finish.
The Unassuming Hero: Masking Tape 101
Masking tape is more than just a roll of adhesive paper. It’s a versatile ally that protects surfaces from paint, varnish, or any coating, ensuring clean lines and a polished look. The key to understanding masking tape is to recognize its various types, each designed for different surfaces and applications.
Types of Masking Tape: A Quick Guide
1. General Purpose Masking Tape: Ideal for everyday use on smooth surfaces, this tape is your go-to for basic painting projects.
2. Painter’s Masking Tape: With a stronger adhesive, it’s perfect for heavier coatings and longer application times without leaving residue.
3. Crepe Paper Masking Tape: Known for its conformability, this tape can adhere to irregular surfaces and is often used by professionals for intricate designs.
4. Masking Film: A plastic alternative, it’s ideal for large areas and curves, providing a quick and easy solution.
The Right Tape for the Job: Choosing Wisely
Selecting the right masking tape is crucial. The wrong choice can lead to a messy finish, paint bleed, or even damage to your surfaces. Consider the following factors when choosing your tape:
– Surface material: Different tapes work better on different surfaces. Test a small piece before applying it extensively.
– Paint type: Water-based or oil-based paints require different adhesive strengths.
– Application time: How long the tape needs to withstand paint without losing its stickiness.
– Removal ease: Some tapes are easier to remove than others, which can affect the final look.
The Art of Application: Techniques and Tips
Once you’ve chosen the right tape, it’s time to apply it. Here are some tips to ensure a professional finish:
1. Clean the surface: A clean surface ensures better adhesion and prevents the tape from lifting or leaving residue.
2. Apply firmly and smoothly: Press the tape down without creating bubbles or wrinkles. This requires a steady hand and even pressure.
3. Use sharp edges: Whether using a straight edge or a T-square, sharp edges help create clean lines.
4. Overlap tape edges: When joining two pieces of tape, slightly overlap them to prevent paint from seeping underneath.
5. Remove carefully: After the paint has dried, remove the tape at a 45-degree angle to avoid peeling off fresh paint.
Common Mistakes and How to Avoid Them
Despite your best efforts, mistakes can happen. Here are some common pitfalls and how to sidestep them:
1. Using low-quality tape: Invest in good quality tape to avoid residue and poor adhesion.
2. Applying tape on dirty surfaces: Always clean the area before applying tape.
3. Pressing too hard or too lightly: Find the right pressure to ensure the tape sticks without damaging the surface.
4. Not overlapping tape edges: Overlapping prevents paint from bleeding under the tape.
5. Removing tape too soon or too late: Timing is key to avoid damaging the paint or the surface.
The Emotional Side of Masking Tape
While it may seem like a mundane aspect of painting, the choice and application of masking tape can evoke strong emotions. The satisfaction of peeling off tape to reveal a crisp edge is unparalleled. Conversely, the frustration of a botched job can be disheartening. By understanding the importance of masking tape and taking the time to learn proper techniques, you can transform your painting experience from a chore to a joy.
The Final Touch: Achieving a Professional Finish
In the end, the difference between a professional and amateur finish often comes down to the details. Paying attention to the type of masking tape you use, how you apply it, and when you remove it can elevate your project to the next level. Remember, a little patience and the right tools can make all the difference.
So, the next time you embark on a painting project, don’t underestimate the power of a good masking tape. Embrace the process, and let it guide you to a finish that you can be proud of. Whether you’re aiming for a professional look or simply want to avoid the common pitfalls of DIY painting, the right masking tape can be your secret weapon.

