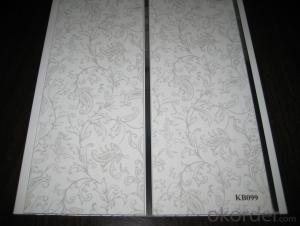
Welcome to the world of home improvement, where DIY projects can be both rewarding and challenging. One such project that many homeowners tackle is hanging a drop ceiling grid. Its a fantastic way to enhance the aesthetics of a room, improve acoustics, and even hide unsightly wiring or ductwork. In this step-by-step guide, well walk you through the process with a friendly and informal approach, ensuring you feel confident and capable of tackling this project on your own.
Why Choose a Drop Ceiling?
A drop ceiling, also known as a suspended ceiling, is a secondary ceiling that is hung below the existing ceiling. Its a popular choice for many reasons. It can add a modern touch to your space, improve lighting with the addition of recessed lights, and provide easy access to the area above for maintenance or repairs. Plus, its a great way to cover up any imperfections in your current ceiling.
Gather Your Tools and Materials
Before you start, its essential to have all the necessary tools and materials on hand. Heres what youll need:
– A drop ceiling grid system (usually comes with the necessary cross-tees and main beams)
– A tape measure
– A pencil
– A miter saw or utility knife for cutting the grid pieces
– A ladder (a sturdy one, please!)
– Stud finder (to locate the structural supports in your walls)
– Level (to ensure your grid is straight)
– Screws and anchors appropriate for your ceiling material
– Safety gear (gloves, safety glasses, and a dust mask)
Planning Your Layout
Planning is key to a successful ceiling installation. Measure the rooms dimensions carefully and sketch out a layout on paper. Decide where you want the grid lines to fall, keeping in mind any light fixtures, vents, or other obstructions. Remember, a well-planned layout will make the installation process much smoother.
Marking the Ceiling
Once you have your layout, its time to mark the ceiling. Use a stud finder to locate the wall studs and mark their positions on the ceiling with a pencil. These marks will serve as your guide for attaching the main beams.
Installing the Main Beams
With your ceiling marked, you can now install the main beams. Align the beams with the studs and secure them in place using screws and anchors. Make sure each beam is level and properly spaced according to the grid systems requirements.
Cutting Grid Pieces
The grid system will require some pieces to be cut to fit around obstacles or to fill in the last row. Use a miter saw or utility knife to cut the grid pieces to the correct size. Ensure each cut is clean and straight for a professional-looking finish.
Attaching the Grid
Attach the cross-tees to the main beams, making sure they are secure and level. Then, start attaching the cut grid pieces to the cross-tees, working your way across the room. Its important to work systematically to ensure a consistent and level installation.
Handling Obstacles
If you encounter light fixtures, vents, or other obstacles, youll need to create openings in the grid. This can be done by cutting out sections of the grid and fitting them around the obstruction. Be sure to secure any openings with additional support if necessary.
Adding Finishing Touches
Once the grid is installed, you can add the ceiling tiles or panels of your choice. These can be easily snapped into place within the grid system. Choose tiles that complement your rooms design and provide the desired level of acoustic performance.
Maintenance and Care
A drop ceiling requires minimal maintenance, but its essential to clean the tiles periodically to remove dust and improve air quality. Also, remember that the space above the drop ceiling is accessible, so use it wisely for storage or maintenance access.
Troubleshooting Common Issues
If you run into any issues during installation, dont fret. Common problems like uneven beams or difficulty cutting grid pieces can usually be resolved with a little patience and the right tools. If youre unsure, consult the manufacturers guidelines or seek advice from experienced DIYers.
Enjoy Your New Ceiling
Now that your drop ceiling is installed, take a moment to admire your handiwork. Not only have you improved the look of your room, but youve also gained a new sense of accomplishment from completing a challenging project.
Remember, the key to a successful DIY project is preparation, patience, and a willingness to learn. Happy ceiling hanging!

