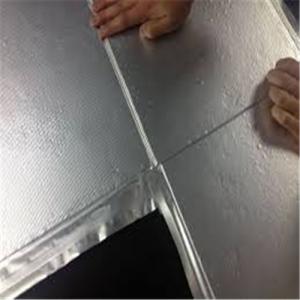
Hey there, DIY enthusiast! Are you ready to take on the exciting task of insulating your home with XPS boards? If you’re nodding your head enthusiastically, then you’re in the right place! Let’s dive into this journey together, exploring the world of insulation, and making your home a cozy, energy-efficient haven. Buckle up, and let’s get started!
What is XPS Board and Why Should You Care?
Before we jump into the nitty-gritty, let’s talk about what XPS boards are. XPS stands for Extruded Polystyrene, which is a type of insulation material made from polystyrene beads that are heated and then extruded into a rigid foam board. It’s lightweight, durable, and offers excellent thermal resistance, making it a popular choice for insulation projects.
The Benefits of Insulating with XPS Boards
Insulation is more than just a home improvement project; it’s an investment in your comfort and your wallet. Here’s why XPS boards are worth considering:
– Energy Efficiency: XPS boards can significantly reduce your energy bills by trapping heat inside during winter and keeping your home cool in the summer.
– Moisture Resistance: These boards are water-resistant, which means they won’t absorb moisture and can help prevent mold and mildew growth.
– Soundproofing: If you’re tired of hearing every little noise from your neighbors, XPS boards can help dampen sound transmission.
– Longevity: With proper installation, XPS boards can last for decades, providing you with long-term insulation benefits.
Preparing for the Big Day
Before you start cutting and fitting XPS boards, there are a few things you need to prepare:
– Tools: You’ll need a utility knife, a straight edge, a saw, a level, and safety gear like gloves and goggles.
– Materials: Apart from XPS boards, you’ll also need adhesive, sealant, and possibly some fasteners.
– Measurements: Take accurate measurements of the areas you plan to insulate to ensure you have the right amount of boards.
Step 1: Planning Your Insulation
Planning is key to a successful insulation project. Sketch out your home’s layout and mark the areas you want to insulate. Consider the following:
– Attic Insulation: If your attic is unfinished, it’s a prime spot for insulation.
– Walls: Insulating walls can be a bit more complex, but it’s worth it for the energy savings.
– Foundation: Don’t forget about the foundation; it’s often overlooked but can be a significant source of heat loss.
Step 2: Cutting the XPS Boards
Now that you have a plan, it’s time to cut the XPS boards to fit your space. Here’s how:
1. Mark the Cuts: Use a pencil and a straight edge to mark where you need to cut the board.
2. Cut with Care: Use a utility knife and a straight edge to make clean, straight cuts.
3. Test Fit: Before you commit to the cut, test fit the board in its intended spot to ensure a snug fit.
Step 3: Installing the XPS Boards
With your boards cut and ready, it’s time to install them. Follow these steps:
1. Apply Adhesive: Use a construction adhesive to attach the boards to the surface. Make sure to follow the adhesive’s instructions for application and drying time.
2. Press Firmly: Once the adhesive is applied, press the board firmly into place.
3. Check for Level: Use a level to ensure the board is installed straight and even.
4. Seal the Edges: Use a sealant to cover the edges of the boards and any seams to prevent air and moisture infiltration.
Step 4: Finishing Touches
After all the boards are installed, you’ll want to finish up with some final touches:
– Inspect: Walk around your home and inspect the installation for any gaps or uneven areas.
– Seal: Apply additional sealant as needed to ensure a tight seal.
– Clean Up: Don’t forget to clean up your work area and properly dispose of any waste materials.
The Joy of a Job Well Done
Congratulations! You’ve successfully insulated your home with XPS boards. Now sit back, relax, and enjoy the fruits of your labor. You’ve not only made your home more comfortable but also more energy-efficient. Remember, a well-insulated home is a happy home!
Tips for Maintenance and Longevity
To keep your XPS insulation performing at its best, here are a few maintenance tips:
– Regular Checks: Periodically check your insulation for any signs of damage or wear.
– Seal Damage: If you find any damaged areas, seal them promptly to prevent heat loss and moisture entry.
– Ventilation: Ensure your home has proper ventilation to prevent condensation and mold growth.
Wrapping Up
Insulating with XPS boards is a rewarding project that can significantly improve your home’s comfort and energy efficiency. By following these steps, you’ve taken a big step towards a greener, more sustainable lifestyle. So, go ahead and pat yourself on the back—you’ve earned it!
Whether you’re a seasoned DIYer or just starting out, remember that every project is a learning experience. And who knows, maybe you’ll inspire others to take on the challenge of insulation too. Happy insulating!

