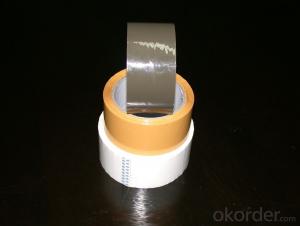
Leaky pipes are a common household problem that can lead to costly water damage if not addressed promptly. One effective solution for fixing leaky pipes is using Pipe Tape on PVC. This article will explore the benefits of using pipe tape, the process of applying it, and tips for ensuring a long-lasting repair.
Why Choose Pipe Tape?
Pipe tape, also known as plumber’s tape or Teflon tape, is a versatile and easy-to-use product for repairing leaks in pipes. It’s made from a thin layer of plastic that can be easily wrapped around the leaky area to create a watertight seal. Here are some reasons why pipe tape is a popular choice for fixing pipes:
– Affordability: Pipe tape is relatively inexpensive compared to other repair methods, making it an attractive option for homeowners on a budget.
– Ease of Use: With a simple application process, pipe tape can be used by anyone, regardless of their plumbing experience.
– Wide Application: It works well on various types of pipes, including PVC, and can be used for both temporary and permanent repairs.
– Durability: When applied correctly, pipe tape can last for years, providing a reliable solution to leaky pipes.
The Process of Applying Pipe Tape
Applying pipe tape to a leaky PVC pipe involves several steps. Follow these guidelines to ensure a successful repair:
1. Identify the Leak: First, you need to locate the source of the leak. Listen for dripping sounds or look for wet spots around the pipe.
2. Prepare the Pipe: Before applying the tape, clean the pipe thoroughly. Remove any dirt, grease, or debris that could interfere with the tape’s adhesion.
3. Cut the Tape: Cut a piece of pipe tape long enough to wrap around the pipe several times. The length will depend on the pipe’s diameter and the size of the leak.
4. Apply the Tape: Start wrapping the tape around the pipe, overlapping each turn slightly. Make sure to cover the entire leaky area and extend a bit beyond it.
5. Tighten the Wrap: As you wrap, apply firm pressure to ensure the tape adheres well to the pipe’s surface. This will help create a tight seal.
6. Seal the Tape: After wrapping, use a wrench or your hands to tighten the tape further, ensuring a secure fit.
7. Check for Leaks: Once the tape is in place, turn on the water supply and check for any signs of leakage. If the leak persists, you may need to add more tape or adjust the existing wrap.
Tips for a Successful Repair
To maximize the effectiveness of your pipe tape repair, consider these tips:
– Choose the Right Tape: Not all pipe tapes are created equal. Look for high-quality tape that is specifically designed for use on PVC pipes.
– Wrap Properly: Ensure that the tape is wrapped tightly and evenly around the pipe. Uneven wrapping can lead to leaks.
– Monitor the Repair: Regularly check the repaired area to ensure the tape remains in place and continues to prevent leaks.
– Consider Professional Help: If the leak is severe or the pipe is damaged beyond repair, it may be best to consult a professional plumber.
When to Replace Instead of Repair
While pipe tape is a great solution for many leaky pipe issues, there are times when replacing the pipe is the better option. Consider replacing the pipe if:
– The leak is large or the pipe is severely damaged.
– The pipe has multiple leaks or is showing signs of corrosion.
– The pipe is old and has reached the end of its useful life.
Conclusion
Pipe tape on PVC is a cost-effective and straightforward solution for fixing leaky pipes. By following the proper application process and taking the necessary precautions, you can effectively stop leaks and prevent further water damage. Remember, while pipe tape offers a temporary to semi-permanent fix, it’s essential to monitor the repair and consider a permanent solution if the problem persists.
Whether you’re a DIY enthusiast or simply want to save on plumbing bills, pipe tape is a handy tool to have in your home repair arsenal. With a little patience and attention to detail, you can tackle leaky pipes with confidence.

