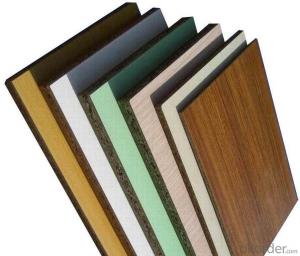
Plywood ceilings have been a popular choice for homeowners and interior designers alike, offering a unique and warm aesthetic to any space. Whether you’re looking to create a cozy atmosphere in your living room or add a touch of elegance to your dining area, plywood ceilings are an excellent option to consider. In this article, we’ll explore the process of installing a plywood ceiling, the benefits of choosing this material, and some creative ideas to make your space truly stand out.
Why Choose Plywood for Your Ceiling?
Plywood is an engineered wood product made from thin layers of wood veneer glued together under heat and pressure. This construction gives plywood its strength, durability, and versatility, making it an ideal material for ceiling installations. Some of the key advantages of using plywood for your ceiling include:
– Aesthetic Appeal: Plywood comes in a variety of finishes and can be stained, painted, or left natural to achieve the desired look.
– Cost-Effectiveness: Compared to other materials, plywood is relatively affordable, making it an attractive option for those on a budget.
– Durability: Plywood is strong and can withstand changes in temperature and humidity, reducing the risk of warping or cracking.
– Sustainability: As an engineered wood product, plywood is often made from sustainable sources, making it an eco-friendly choice.
Planning Your Plywood Ceiling Project
Before you start installing your plywood ceiling, it’s important to plan your project carefully. Here are some steps to consider:
1. Assess Your Space: Take measurements of your ceiling and determine the layout of your plywood panels. Consider the room’s dimensions and the desired pattern for the plywood.
2. Select Your Plywood: Choose the type of plywood that best suits your needs in terms of quality, appearance, and budget. Marine-grade plywood is often recommended for ceilings due to its moisture resistance.
3. Gather Your Tools: You’ll need a variety of tools for this project, including a circular saw, drill, level, tape measure, and screws.
4. Prepare the Surface: Ensure your ceiling is clean and free of any debris. If necessary, repair any cracks or holes in the existing surface.
5. Lay Out Your Panels: Dry fit your plywood panels on the ceiling to determine the best layout and make any necessary adjustments.
The Installation Process
Once you’ve planned your project, it’s time to start the installation process. Here’s a step-by-step guide to help you through it:
1. Mark Your Ceiling: Use a level and tape measure to mark the placement of your plywood panels on the ceiling.
2. Cut Your Panels: Cut your plywood panels to size using a circular saw. Be sure to follow safety precautions and make precise cuts.
3. Attach the Panels: Attach each panel to the ceiling using screws, ensuring they are evenly spaced and secure.
4. Check for Level: Use a level to check that each panel is properly aligned and adjust as needed.
5. Finish the Edges: Trim any overhanging edges and ensure a clean, finished look.
6.

