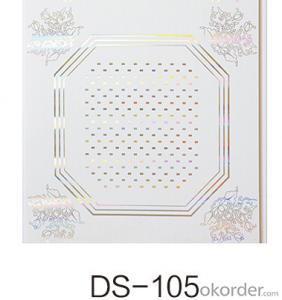
Welcome to the exciting world of home improvement! If youre a DIY enthusiast looking to add a touch of elegance and style to your home, PVC ceiling panels might just be the perfect solution for you. In this guide, well walk you through the process of installing PVC ceiling panels in a fun, engaging, and easy-to-understand manner. So, lets dive right in!
Why Choose PVC Ceiling Panels?
Before we get our hands dirty, its important to understand why PVC ceiling panels are such a popular choice among homeowners and DIYers. PVC, or polyvinyl chloride, is a versatile material known for its durability, affordability, and ease of installation. Its waterproof, easy to clean, and comes in a variety of designs and colors to suit any rooms aesthetic. Plus, its environmentally friendly, as it can be recycled and is free from harmful substances.
Planning Your PVC Ceiling Panel Project
The first step in any DIY project is planning. Start by measuring the dimensions of the room where you want to install the panels. This will help you determine the number of panels youll need and the layout that best suits your space. Consider the rooms purpose, the lighting, and the overall design theme to choose the right panels for your project.
Gathering Your Tools and Materials
Once youve planned your project, its time to gather all the necessary tools and materials. Youll need PVC ceiling panels, a utility knife, a tape measure, a pencil, a straight edge, a saw (for cutting the panels), a drill, screws, and a ladder. Make sure all your tools are in good working order to ensure a smooth installation process.
Preparing the Surface
Before you can install your PVC ceiling panels, you need to prepare the surface. Clean the ceiling thoroughly, removing any dust, dirt, or debris. Check for any uneven areas or damage that might need to be repaired before proceeding. A clean, smooth surface will ensure a secure and professional-looking installation.
Marking and Measuring
With a clean ceiling, its time to mark and measure. Use a pencil and a straight edge to mark the positions where youll install the panels. Measure the length and width of each panel and transfer those measurements to the ceiling. Be precise, as this will affect the overall look of your finished project.
Cutting the Panels
PVC ceiling panels can be cut to fit your space perfectly. Use a saw designed for cutting plastic materials to cut the panels to the correct size. Be sure to follow the manufacturers guidelines for cutting to avoid damaging the panels. Always safety first – wear protective gear when cutting.
Installing the Panels
Now for the fun part – installing the panels! Start from one corner of the room and work your way across. Align the panel with the marks you made earlier and secure it with screws. Use a drill to create pilot holes to prevent the panel from splitting. Work carefully and patiently to ensure a neat and secure fit.
Dealing with Seams and Edges
One of the challenges of installing PVC ceiling panels is dealing with seams and edges. Use a utility knife to trim any excess material and create a clean, seamless look. Be careful not to cut too much, as this can damage the panel.
Finishing Touches
After all the panels are installed, take a step back and admire your handiwork. If you notice any gaps or uneven areas, make the necessary adjustments. A little bit of caulk can work wonders in smoothing out seams and creating a polished finish.
Maintaining Your PVC Ceiling Panels
The best part about PVC ceiling panels is how easy they are to maintain. A simple wipe with a damp cloth is usually all it takes to keep them looking clean and new. Avoid using harsh chemicals or abrasive materials that could damage the surface.
Conclusion
Installing PVC ceiling panels is a rewarding project that can transform the look of any room. With a little planning, the right tools, and some patience, you can achieve professional results in your own home. So, why not give it a try? Your ceiling will thank you!

