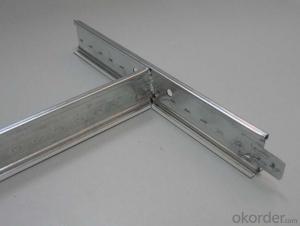
Welcome to the wonderful world of home improvement where you can unleash your creativity and transform your living space with a touch of elegance and style. In this article, well be diving into the exciting process of installing PVC ceiling tiles. Whether youre a DIY enthusiast or just looking to add a fresh, new look to your home, this step-by-step tutorial is designed to guide you through the process with ease and confidence. So, lets get started!
Materials and Tools Youll Need
Before we jump into the installation process, its essential to gather all the necessary materials and tools. Heres a list of what youll need for a successful PVC ceiling tile installation:
– PVC ceiling tiles (of course!)
– A tape measure
– A utility knife
– A straight edge or ruler
– A chalk line
– A pry bar
– A staple gun or adhesive (depending on the tile type)
– A ladder
– Safety goggles and gloves
Preparing the Workspace
Safety first! Make sure the area youll be working in is clean, well-lit, and free of any obstacles. Its also a good idea to remove any furniture or decorations from the room to prevent damage and give yourself ample space to work. Dont forget to put on your safety goggles and gloves to protect yourself during the installation process.
Measuring and Marking
Now that your workspace is ready, its time to measure the ceiling. Use a tape measure to determine the dimensions of your ceiling and mark the center point. From there, use a chalk line to create guidelines that will help you align your tiles perfectly. Remember, accurate measurements are crucial for a professional-looking result.
Cutting the Tiles
PVC ceiling tiles are designed to be easy to cut, but its important to follow the manufacturers instructions to ensure a clean, precise cut. Use a utility knife and a straight edge or ruler to cut the tiles to the correct size. Be sure to do this in a well-ventilated area to avoid inhaling any dust or fumes.
Installing the Border
The border is the first part of the ceiling tile installation process. It serves as a base for the rest of the tiles and helps to create a seamless look. Start by attaching the border to the ceiling using a staple gun or adhesive, depending on the type of border you have. Make sure its level and securely fastened.
Laying the Tiles
With the border in place, you can now start laying the tiles. Begin at the center of the ceiling and work your way outwards, ensuring that each tile is properly aligned with the guidelines you created earlier. Use a staple gun or adhesive to secure the tiles to the ceiling, taking care not to overtighten the staples, which can cause the tiles to warp.
Dealing with Seams and Edges
As you lay the tiles, youll encounter seams and edges where tiles meet. Its essential to handle these carefully to maintain a clean and professional appearance. Use a pry bar to gently lift and adjust the tiles as needed, ensuring a tight fit and smooth transition between each tile.
Finishing Touches
Once all the tiles are in place, its time for the finishing touches. Inspect the installation for any gaps or misalignments and make any necessary adjustments. If your tiles have a specific pattern or design, make sure its consistent throughout the ceiling.
Maintenance and Care
PVC ceiling tiles are low maintenance and easy to clean, but its still important to take care of them to prolong their lifespan. Regularly dust the tiles with a soft cloth or vacuum cleaner with a brush attachment. For more stubborn stains, a damp cloth and mild detergent should do the trick. Avoid using harsh chemicals or abrasive cleaning tools that can damage the tiles.
Enjoy Your New Look
Congratulations! Youve successfully installed your PVC ceiling tiles, giving your room a fresh, updated appearance. PVC is not only stylish but also durable and easy to maintain, making it an excellent choice for any home. So sit back, relax, and enjoy the fruits of your labor.
Troubleshooting Common Issues
If you encounter any issues during the installation process, dont worry. Here are some common problems and their solutions:
– Tiles Not Laying Flat: This can happen if the staples are not evenly distributed or if the tiles are warped. Try adjusting the staples or replacing any warped tiles.
– Gaps Between Tiles: Small gaps can be filled with caulk or a matching paint to match the tile color.
– Stains or Discoloration: If your tiles have stains or discoloration, it may be due to exposure to sunlight or moisture. Consider using a UV-resistant or moisture-resistant tile to prevent this issue.
Conclusion
Installing PVC ceiling tiles is a rewarding project that can significantly enhance the look and feel of your home. With the right materials, tools, and a little patience, you can achieve a professional result. Remember to take your time, follow the steps carefully, and dont be afraid to ask for help if you need it. Happy renovating!

