Suspended ceilings have been a popular choice for many homeowners and businesses alike. They offer a clean, modern look and can be easily customized to fit any space. But, the process of installing a suspended ceiling can seem daunting, especially for those who have never done it before. Thats where a Suspended Ceiling Grid Kit comes in. It simplifies the process and makes it accessible for anyone, regardless of their experience level.
The Benefits of a Suspended Ceiling Grid Kit
Before we dive into the installation process, lets talk about why you might want to use a suspended ceiling grid kit in the first place. Suspended ceilings are not only aesthetically pleasing, but they also offer several practical benefits. They can help with sound absorption, hide unsightly wiring or plumbing, and provide a clean surface for lighting fixtures. Plus, theyre easy to maintain and can be updated or replaced as needed.
Unboxing the Kit
When you first receive your suspended ceiling grid kit, its important to take the time to unbox and inventory all the components. This typically includes the main grid pieces, cross tees, and any necessary hardware for installation. Its also a good idea to review the instructions that come with the kit to ensure you have everything you need and understand the process.
Preparing the Space
Before you can start installing your suspended ceiling, youll need to prepare the space. This usually involves cleaning the existing ceiling and ensuring its level and free of any obstructions. You may also need to install additional support beams or structures, depending on the size and layout of your room.
Assembling the Grid
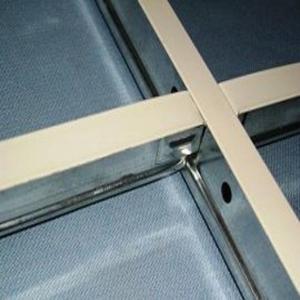
The heart of any suspended ceiling is the grid system. This is what holds the ceiling tiles in place and gives the ceiling its structure. To assemble the grid, youll start by connecting the main runners to the cross tees. Its important to use the correct hardware and follow the manufacturers instructions to ensure a secure fit.
Hanging the Ceiling Tiles
Once the grid is in place, its time to hang the ceiling tiles. These typically snap into place on the grid, making it a simple process. However, its important to start from one corner of the room and work your way out to ensure a neat and even installation.
Finishing Touches
After all the tiles are in place, you can add any finishing touches, such as painting the grid or adding additional lighting fixtures. This is also the time to make any final adjustments to the grid or tiles to ensure everything is level and secure.
Maintenance and Care
One of the best things about suspended ceilings is how easy they are to maintain. Regular cleaning is as simple as dusting or vacuuming the tiles. If a tile becomes damaged, it can be easily replaced without affecting the rest of the ceiling.
Troubleshooting Common Issues
While the process of installing a suspended ceiling is generally straightforward, you may encounter some common issues. These can include uneven tiles, difficulty securing the grid, or issues with lighting fixtures. The key to troubleshooting these issues is to carefully review the instructions and consider any adjustments you may need to make to your installation process.
The Joy of a DIY Project
Theres something incredibly satisfying about completing a DIY project, especially one that results in such a noticeable transformation to your space. A suspended ceiling grid kit allows you to take on this project with confidence, knowing that you have all the tools and guidance you need to succeed.
In Conclusion
A suspended ceiling grid kit is an excellent investment for anyone looking to update the look of their space while also gaining the practical benefits of a suspended ceiling. With a little time and effort, you can create a professional-looking installation that you can be proud of. So, go ahead and give it a try – you might just surprise yourself with what youre capable of!

