Suspended ceilings, also known as drop ceilings or false ceilings, are a popular choice for many commercial and residential spaces. They offer a variety of benefits, including easy installation, sound absorption, and the ability to hide utilities and wiring. But what exactly are the components that make up a suspended ceiling grid? Lets take a comprehensive look at the parts that hold it all together.
The Grid System: The Backbone of the Ceiling
The grid system is the foundation of a suspended ceiling. It consists of main runners, cross tees, and sometimes angle beads. The main runners are the longer horizontal members that run parallel to the longer walls of the room. Cross tees are the shorter perpendicular members that intersect with the main runners, creating a grid pattern. Angle beads are optional and are used to create a finished edge along the walls.
Main Runners: The Long Stretches
Main runners are typically made from metal or plastic and come in various lengths to accommodate the dimensions of the room. They are designed to support the weight of the ceiling tiles and any additional loads, such as lighting fixtures or air vents. The installation of main runners is crucial, as it determines the overall stability and alignment of the grid system.
Cross Tees: The Connectors
Cross tees are the shorter members that connect the main runners, creating the grid pattern. They are also made from metal or plastic and come in various lengths to fit between the main runners. Cross tees are essential for providing support to the ceiling tiles and ensuring that they remain level and in place.
Angle Beads: The Finishing Touch
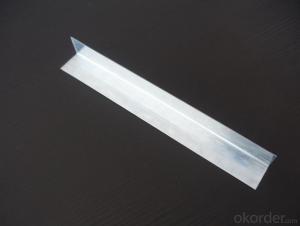
Angle beads are the finishing pieces that are used to create a clean, professional-looking edge along the walls. They are typically made from metal or plastic and can be painted or finished to match the rest of the ceiling. While angle beads are not always necessary, they can enhance the appearance of the suspended ceiling and provide a sense of completeness.
Ceiling Tiles: The Stars of the Show
Ceiling tiles are the visible part of the suspended ceiling and come in a wide variety of materials, styles, and colors. They can be made from mineral fiber, metal, wood, or even fabric, and can be painted or finished to match the rooms decor. The tiles are designed to fit into the grid system, allowing for easy installation and replacement if needed.
Accessories and Additional Components
In addition to the main components, there are several accessories and additional components that can be used with a suspended ceiling system. These include:
– Suspenders: These are used to hang the main runners from the ceiling, providing support and preventing sagging.
– Clips: Clips are used to secure the ceiling tiles to the cross tees, ensuring that they stay in place.
– Baffles: Baffles are used to create a more defined grid pattern and can also serve as a decorative element.
– Lighting Fixtures: Lighting fixtures can be integrated into the grid system, providing both functional and aesthetic benefits.
– Air Diffusers: Air diffusers can be installed in the grid system to help with air circulation and temperature regulation.
The Benefits of Suspended Ceilings
Suspended ceilings offer a multitude of benefits, making them an attractive option for many spaces. Some of the key benefits include:
– Aesthetics: With a wide variety of tile options, suspended ceilings can be customized to fit any design or style.
– Acoustics: Suspended ceilings can help absorb sound and reduce noise levels in a room.
– Accessibility: The grid system allows for easy access to utilities and wiring, making maintenance and repairs simpler.
– Flexibility: Suspended ceilings can be easily modified or updated as needed, providing a versatile solution for changing needs.
The Process of Installing a Suspended Ceiling
Installing a suspended ceiling is a multi-step process that requires careful planning and execution. Heres a general overview of the steps involved:
1. Planning: Before any installation can begin, its important to measure the room and plan the layout of the grid system. This includes determining the placement of main runners, cross tees, and any additional components.
2. Preparation: The room should be cleared of any obstacles and cleaned to ensure a smooth installation process.
3. Installation of Main Runners: The main runners are installed first, following the planned layout. They are typically secured to the ceiling using suspenders.
4. Attachment of Cross Tees: Once the main runners are in place, cross tees are attached to create the grid pattern.
5. Installation of Angle Beads: If angle beads are being used, they are installed along the perimeter of the room to create a finished edge.
6. Placement of Ceiling Tiles: The ceiling tiles are then placed into the grid system, snapping into place on the cross tees.
7. Addition of Accessories: Any additional components, such as lighting fixtures or air diffusers, are installed at this stage.
8. Final Inspection: Once all components are in place, a final inspection is conducted to ensure that the installation is secure and meets all requirements.
The Future of Suspended Ceilings
As technology and design trends continue to evolve, so too will the suspended ceiling industry. We can expect to see new materials, innovative designs, and improved functionality in the coming years. With a focus on sustainability and energy efficiency, suspended ceilings will continue to be a popular choice for both commercial and residential spaces.
In conclusion, suspended ceiling grid parts are an essential component of any suspended ceiling system. By understanding the various parts and their functions, you can ensure that your ceiling installation is both functional and aesthetically pleasing. Whether youre a homeowner looking to update your space or a contractor working on a commercial project, knowing the ins and outs of suspended ceilings will help you achieve the desired results.

